
To get started in the world of knitting, all I did was practice casting on. Over and over until I felt comfortable holding the yarn and remembering the how to. If you are just learning, I hope this first step is helpful. It really is as simple as Ed made it look. Today, all we will do is practice casting on. You can do it! Grab your yarn and needles, get cozy on the couch, and let's get started.
First, pull a tail of yarn from your ball long enough for the number of stitches you need for your pattern. For instance, if you need 24 stitches for, say, a scarf, pull a string of yarn that is approximately 24 inches long.
Begin with a slip knot. To form a slip knot, make a loop of yarn. Hold the tail between your left thumb and index finger, and the yarn from the ball in your right. Make a loop by crossing the yarn from your right fingers over the yarn in your left.

Take the yarn now hanging in the front from the ball end, and pull it through the loop from behind. Pull the tail end to tighten.


Insert your needle into the loop, and pull to tighten. Make sure it is tight, but not too tight or it will be difficult to work with later. Trust me on that one.
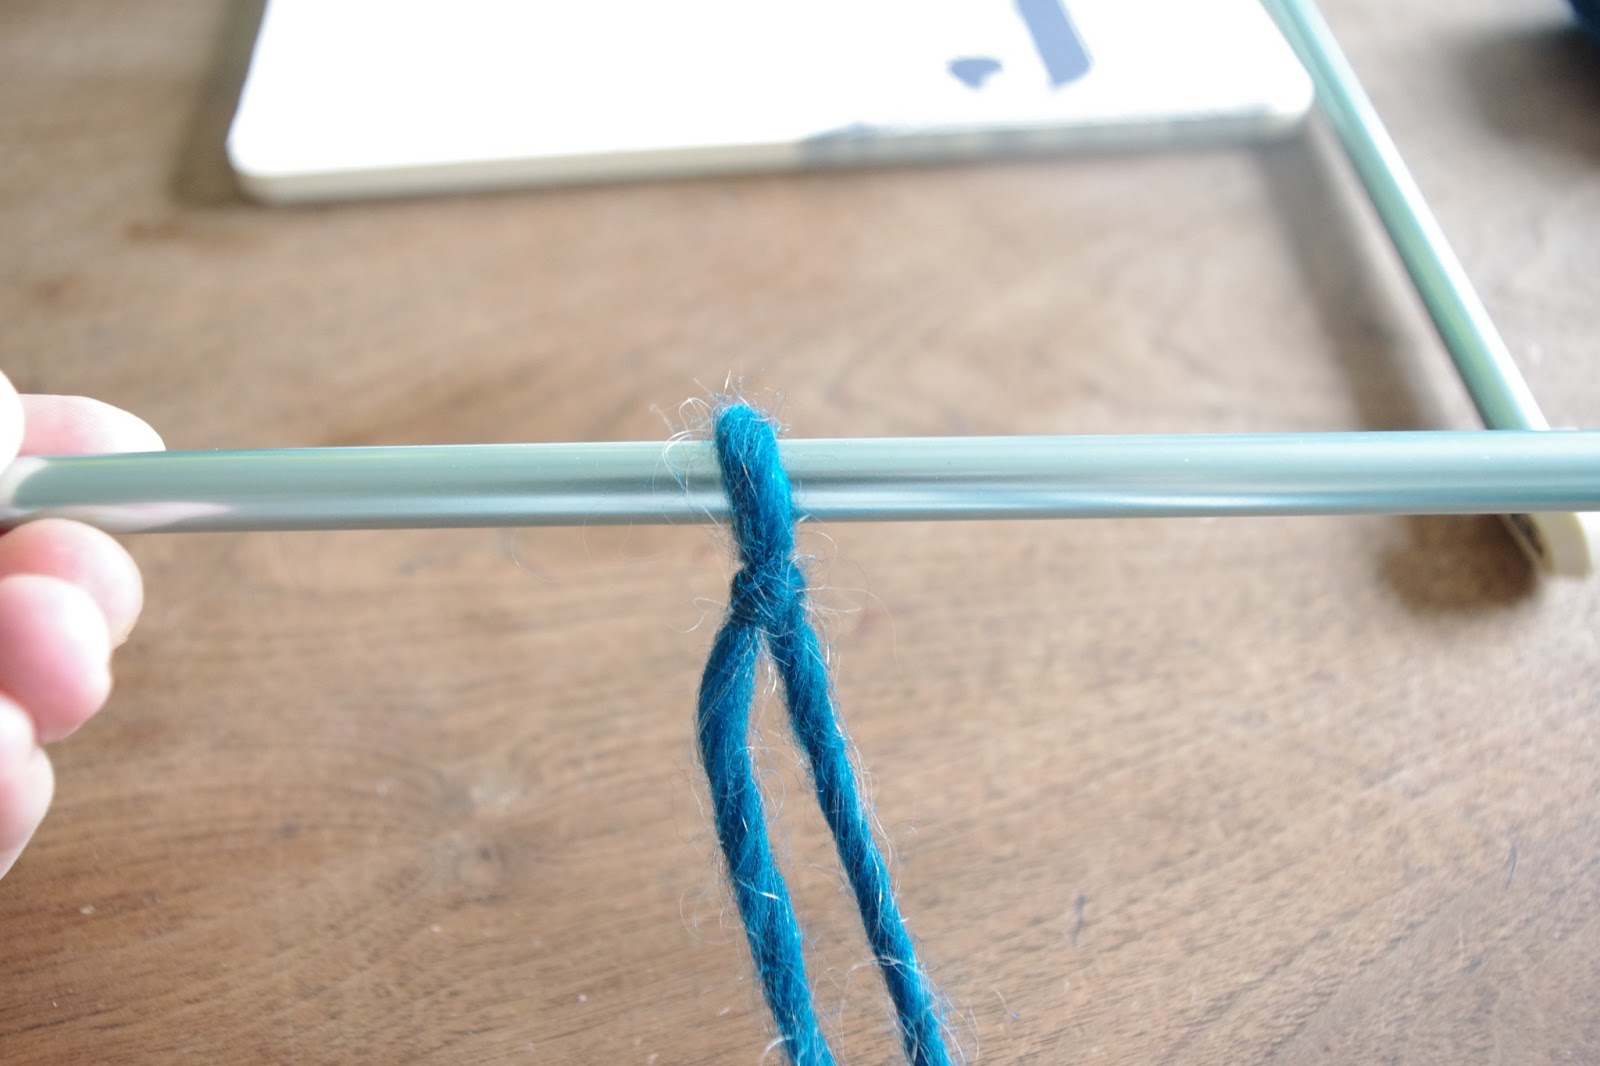
Now you have two threads hanging from your needle, the tail end near you and the ball end from behind the needle. To make your next cast on stitch, put the string in front of your needle over your left thumb. Put the string from the ball end over your index finger so that you have formed sort of a triangle. It should have more tension than the photo below to form the triangle, but I had a hard time holding the camera and the yarn at the same time.

Almost there! Insert the needle behind the yarn on your thumb.

Then insert the needle over the string hanging in front of your index finger.

Pull the needle under and through the loop still hanging on your thumb. Let the loop now fall off your thumb and pull the yarn to tighten the stitch onto the needle.


And congratulations! You have successfully cast on. Just continue to cast on the number of stitches determined by your pattern. Check back here to learn how to make a basic knit stitch. Happy Spring!


