
My friend just had her third baby girl. I wanted to send a gift, but I wanted to try something new. Why not? So I confidently headed to a yarn shop and asked the lady how to make infant legwarmers. We found a pattern, and, after we chose the yarn, she directed me to the double pointed needles, which she assured me I needed for small legwarmers. Oh dear. I haven't even knitted on the round. I could feel my courage fading. But she assured me I could do it. Hmmmmm.....
With the help of several "You Tube" videos, and multiple tries, I figured out how to join the stitches. From there it was basically the same as knitting in a row, without turning your work over like you would when knitting rows. You can do it too. Not a problem.

To knit on double pointed needles, you need 3 or 4 needles + 1. I chose to work with three needles, which means I needed 3 needles plus 1 "working needle," for a total of four needles. The needles I used were size 5.
1. Cast on the number of stitches required for your pattern. For this project, I cast on 36 stitches. Because I used three needles, I needed a number divisible by three. I also wanted an even number because this pattern calls for eight rows of alternating sets of knit 2, purl 2 stitches.

2. After casting on all stitches, evenly distribute them onto the other needles. I had 36 stitches and 3 needles. Since 36 divided by 3 is 12, I needed 12 stitches per needle. To distribute, simply insert an empty needle in front of the needle in your left hand holding the cast on stitches. Slide it off the left needle and onto the empty needle.

Continue until you have the correct number of stitches on the second needle.

3. Distribute the next set of stitches onto the third needle so that you now have the same number of stitches on each needle.
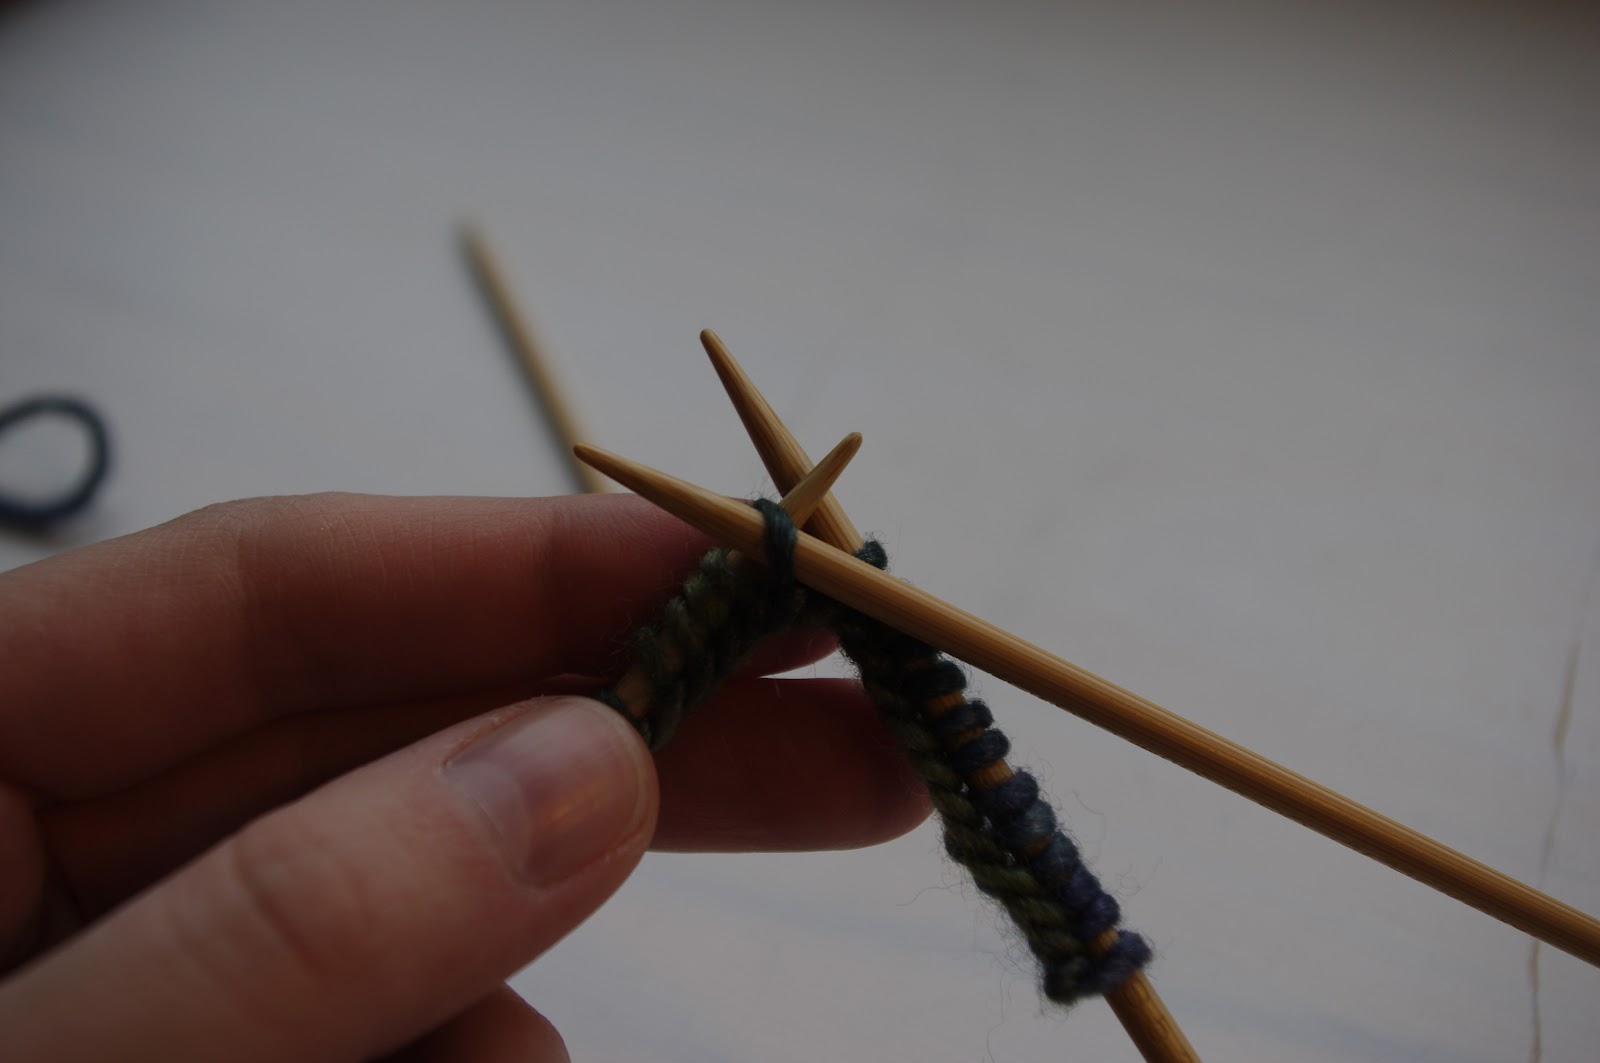

4. To prevent a twist in the finished work, it is important to have all the loops from the cast on stitches facing the same direction toward the center of your work.

5. The next step is to join the stitches to begin knitting our rows. The needles should be arranged so the working yarn is hanging from the top stitch of the right hand needle.

Now we need our fourth "working needle." Insert the fourth needle behind the first stitch on the needle in your left hand, and knit the stitch, using the working yarn from the needle to the right. Pull the stitch fairly tight. Now for the remaining eleven stitches you will be working with the needle from your left hand and the "working needle" in your right. The third needle can hang out for the moment. You did it! The stitches are joined.


You can continue with the pattern and make some stylin' legwarmers. Remember not to turn your work. If you are following this pattern, knit 2, purl 2 for rows 1-8.

The number of rows knit will be determined by the length you want. Once you have completed these, continue with another 8 rows of knit 2, purl 2 before binding off.

No comments:
Post a Comment