April 6, 2012

Artist of the Month


Most of my Etsy orders are mailed from a local, privately owned post office. Last month I sent several bibs, and as we were putting them in the package, the owner asked if I made them myself. "Yes," I replied. 
"You should be artist of the month." 
I laughed. "Thanks," I said. 
"I am serious," the owner told me. "We can feature you this April. We set up a table featuring local artists' work. Let me know if you are interested."

burp cloths
 
 I sure am. Thanks for the honor. Here are a couple of things currently on display in our local post office shop. 


Happy Easter everyone!

March 30, 2012

Distractions


This week has been an adventure. Our car was stolen on Tuesday, and, thankfully, found by Thursday.  To cope with the stress, along with a healthy dose of prayer, I have been sewing several projects. By next week they should be completed and I can share them with you. Until then, here's a glimpse of my preferred therapy.

 
                                                                                  ***

                                                                            love this


March 19, 2012

Plans


There is a whole lot of scheming going on around here for the garden. I know it will take several years to get the yard in shape, but I love the whole design process.


March 12, 2012

Joining Stitches on the Round with Double Pointed Needles

  Until recently I have not ventured beyond the knitting basics. I can cast on and bind off. I can knit and purl. I've made scarves and dishcloths.

 My friend just had her third baby girl. I wanted to send a gift, but I wanted to try something new. Why not? So I confidently headed to a yarn shop and asked the lady how to make infant legwarmers. We found a pattern, and, after we chose the yarn, she directed me to the double pointed needles, which she assured me I needed for small legwarmers. Oh dear. I haven't even knitted on the round. I could feel my courage fading. But she assured me I could do it. Hmmmmm.....

 With the help of several "You Tube" videos, and multiple tries, I figured out how to join the stitches. From there it was basically the same as knitting in a row, without turning your work over like you would when knitting rows. You can do it too. Not a problem.


To knit on double pointed needles, you need 3 or 4 needles + 1. I chose to work with three needles, which means I needed 3 needles plus 1 "working needle," for a total of four needles. The needles I used were size 5.

 1. Cast on the number of stitches required for your pattern. For this project, I cast on 36 stitches. Because I  used three needles, I needed a number divisible by three. I also wanted an even number because this pattern calls for eight rows of alternating sets of knit 2,  purl 2 stitches.


2. After casting on all stitches, evenly distribute them onto the other needles. I had 36 stitches and 3 needles. Since 36 divided by 3 is 12, I needed 12 stitches per needle. To distribute, simply insert an empty needle in front of the needle in your left hand holding the cast on stitches. Slide it off the left needle and onto the empty needle.


Continue until you have the correct number of stitches on the second needle.


3. Distribute the next set of stitches onto the third needle so that you now have the same number of stitches on each needle.


4. To prevent a twist in the finished work, it is important to have all the loops from the cast on stitches facing the same direction toward the center of your work.


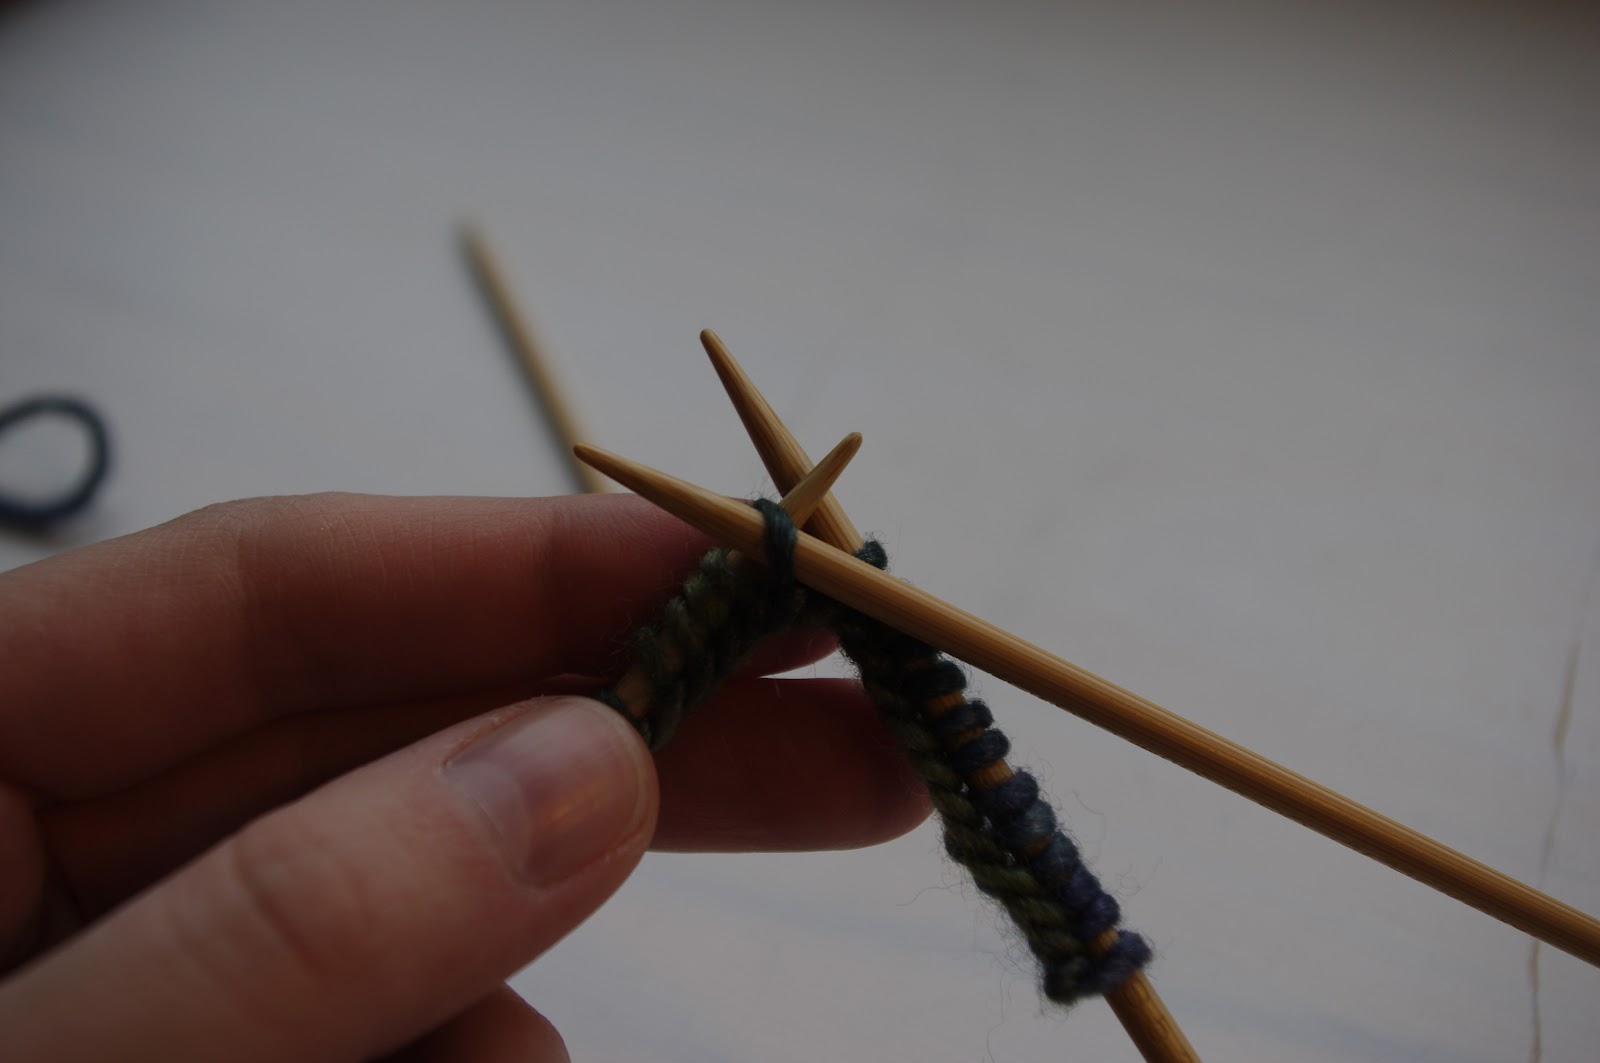
5. The next step is to join the stitches to begin knitting our rows. The needles should be arranged so the working yarn is hanging from the top stitch of the right hand needle.


Now we need our fourth "working needle." Insert the fourth needle behind the first stitch on the needle in your left hand, and knit the stitch, using the working yarn from the needle to the right. Pull the stitch fairly tight. Now for the remaining eleven stitches you will be working with the needle from your left hand and the "working needle" in your right. The third needle can hang out for the moment. You did it! The stitches are joined.


You can continue with the pattern and make some stylin' legwarmers. Remember not to turn your work. If you are following this pattern,  knit 2, purl 2 for rows 1-8.


The number of rows knit will be determined by the length you want. Once you have completed these,  continue with another 8 rows of knit 2, purl 2 before binding off.

I am working on a second set. I made these with at least 5 extra rows than the pattern specified, but this time I am adding rows for a longer legwarmer.

March 6, 2012

How to Sew a Curved Seam

Today's post is inspired, in part, by Anna Maria Horner. I've been designing an apron for a wedding shower. I usually back my aprons, so the finished product has two layers of quilter's cotton. This time, however, I was inspired by Horner's "Innocent Crush" home decor line, a heavier weight fabric, so no backing was necessary. 

 Because I am not sewing this apron inside out, I have to iron a seam along the outer edges. The dilemma? I have to iron a curved bottom seam, which is a bit challenging. The fabric usually bunches and tucks and it's nearly impossible to get a smooth edge with my sanity in tact.

Fortunately I own "Seams to Me" by Anna Maria Horner. In it she shares some handy dandy sewing wisdom for sewing such a round seam. I adapted it a bit because I wanted to have an edge where my seam was folded over twice toward the wrong side of the fabric before I sewed it. Are you with me? Here we go:

1.  Determine the shape of the piece needing a smooth fold. In this instance, I cut out my apron pattern as usual. 
2. Grab a piece of cardboard (I used an empty cereal box), and trace the rounded area onto it.

forgive my night photos

3. Cut the shape about 1/2 in. smaller than the line you traced, making sure the edges are smooth.
 4. Press the aluminum foil down around the shape, pressing it smooth with your fingers.


5.   Layer your pieces in the following order:  Your fabric right side down, then about 1/4 in. from the fabric edge place your cardboard covered in foil.
6. With your iron on medium-high, carefully fold the fabric over the foil and press, careful not to burn your fingers.

7. For a double folded seam, place the cardboard/foil shape behind the newly sewn seam, fold the fabric over the foil once more, and iron.
8. Remove the cardboard/foil shape and head to the sewing machine.


Ta-da!

February 22, 2012

Lent Begins


Last Lent, as I was attempting to teach my then four and two year old the concept of sacrifice and spending extra time in prayer to prepare for Easter, I found this idea. One mom suggested using a jelly bean jar to visibly teach our kids what this season is about. Each color represents a different action in which the child participates. For instance, if Ben listens the first time, he earns a white jelly bean. A sacrifice of some kind earns a red one. Yellow represents a kind deed or word. Green is for sharing. In our home we drop a pink jelly bean in the jar when one of the kids overcomes a bad habit (like screaming or whining).

Last year we had separate jars for each child. This year we have a family jar. We are not going to lose jelly beans for bad choices, but instead limit to the ability to add to the jar for the rest of the day. On Sundays, if everyone is on their best behavior in Church, we can enjoy a jelly bean. On Easter, all the candy fills the eggs for our Easter Egg Hunt. The kids already are excited to fill up the jar.

What are some useful "Lent teaching tools" you use? Please share!

February 13, 2012

Adventures in Knitting

With a lot of patience, a little hard work, and "You Tube" tutorials, I finally did it. I've learned how to knit on the round using double pointed needles. The only challenge was joining the stitches. Once conquered, I found my rhythm. When I am finished, these will be legwarmers for a new baby girl.